Setting up a second IPv4 address on the Linux Ubuntu network card.

I did a tutorial earlier explaining why two IPs are used and teaching you how to configure two IPs on the same network card. The practical example was on the Windows operating system, so I showed you in the aforementioned tutorial how to configure two IPs on Windows, today I want to show you how to perform this same procedure, but using Linux and configuring it using the system’s command terminal. If you want to learn more about using two IPs on the same interface, and how to configure it in Windows, click on the image below and check out my previous tutorial.
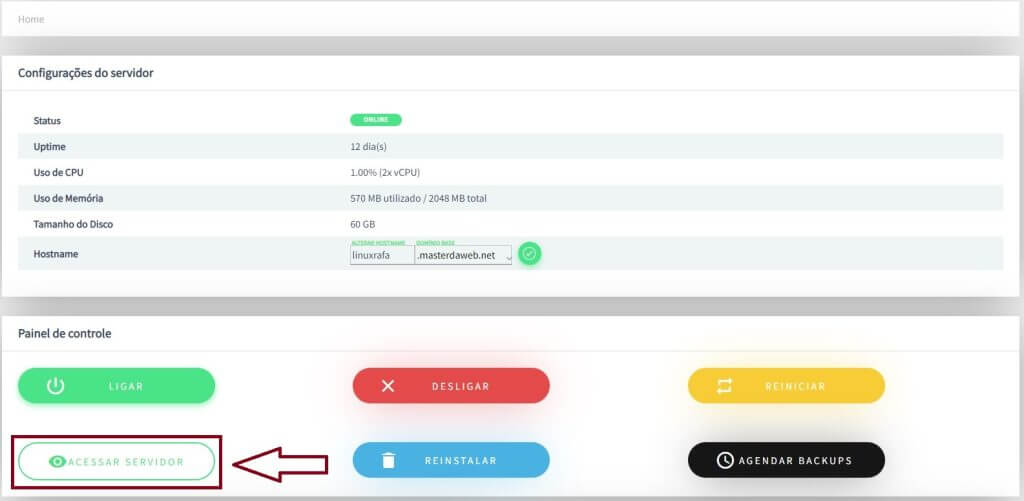
I recommend that you do this by accessing the VPS from the client’s control panel by clicking on the access server button, so that if something goes wrong you don’t lose access to your server, and you remain connected to it to make the correction. Below is an image to help you identify the server access button in the control panel.
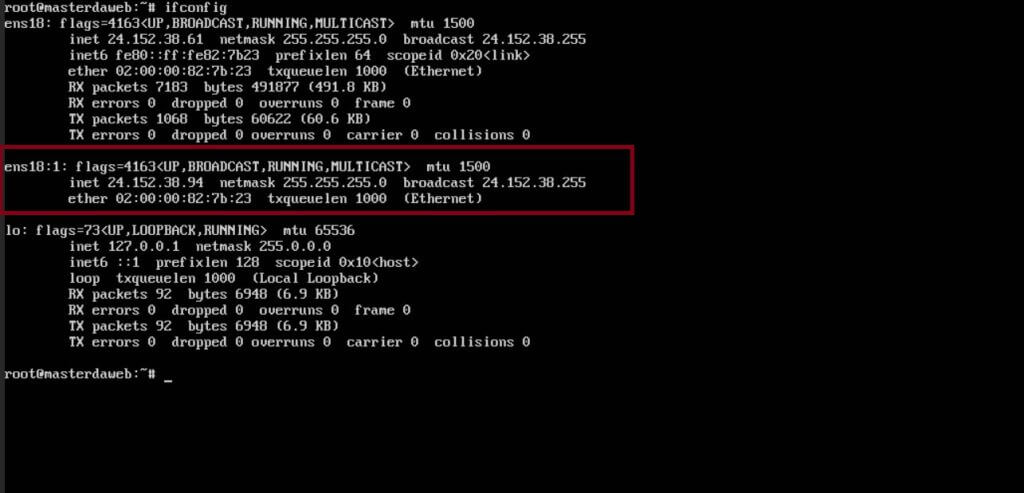
After accessing the VPS we can start the configuration, in this example I am using Ubuntu 21.04 to make the configuration, this configuration will be the same for all Linux operating systems derived from Debian, that is, it includes Debian and all its derivatives such as Ubuntu, MX Linux, Deepin, Mint and etc. First log on to your Linux system with the root user, let’s use the command ifconfig or ip addr show to identify the name of our network interface, on my system the name is ens18, once identified use your favorite text editor and access the configuration file located in the /etc/network/interfaces directory to perform the configuration, the commands are below.
# Identificar o nome da interface de rede.
ifconfig
# ou
ip addr show
# Acessar arquivo de configuração de rede.
vim /etc/network/interfaces 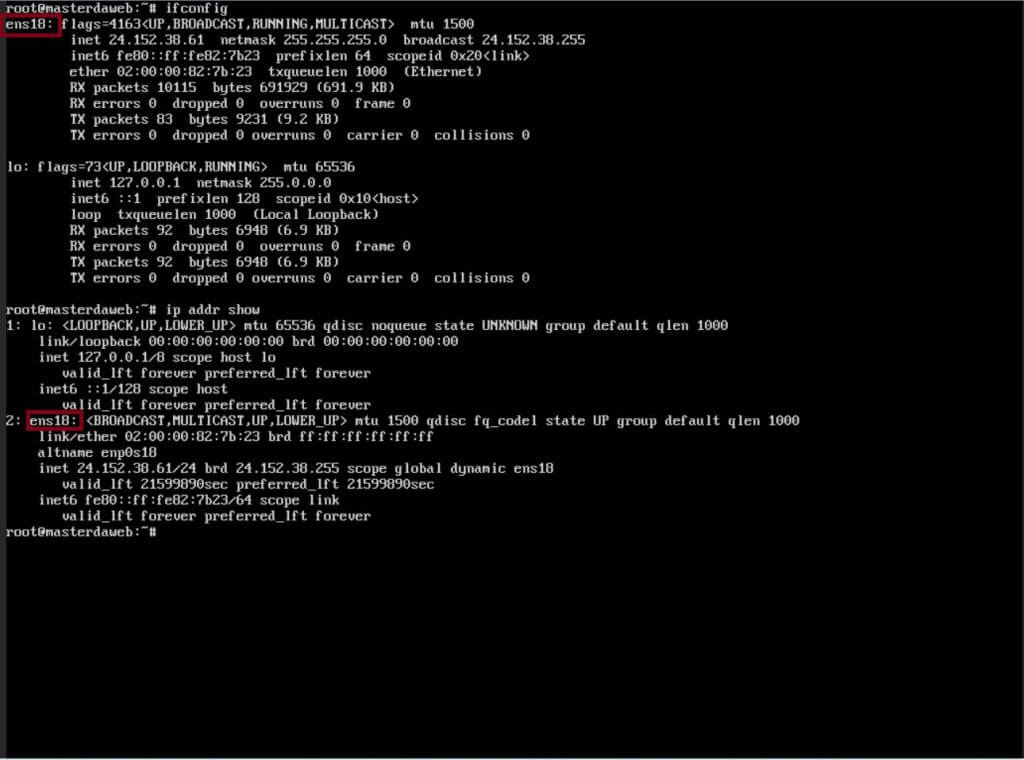
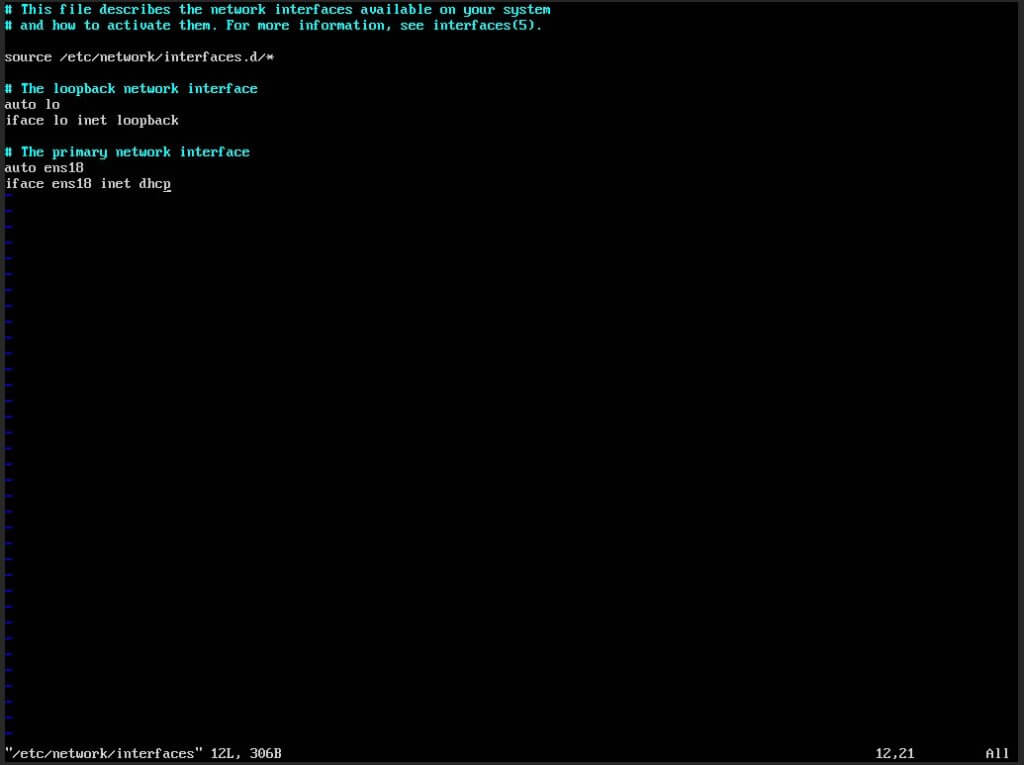
When you access the configuration file, your default settings will be similar to those in the image above, your main IP will be configured to be received via DHCP, we can see this in the line containing iface ens18 inet dhcp.
To configure the second IP we need to create a virtual interface, you will have to use the name of your network interface, followed by :1, the configuration will be in the format below, do the same as below, but using the name of your interface and your secondary IP.
auto ens18:1
iface ens18:1 inet static
      address 24.152.38.94/24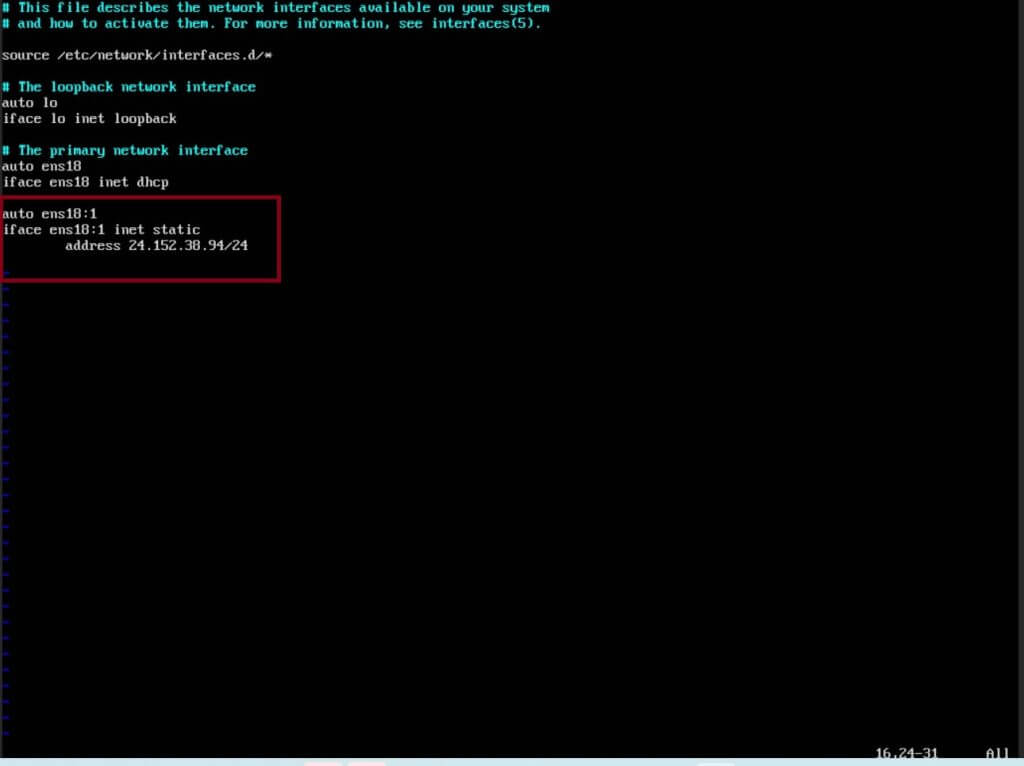
With the secondary IP configured, save the configuration change and restart your server with the reboot command. If configured correctly, your server will already be responding to the new IP after starting.
Check out our post on how to perform this configuration on Linux CentOS 7, follow the link below.
