Remote Support: How to install HopToDesk and provide ID to the IT technician?

With the advancement of technology, remote support has become indispensable for companies and users who need to solve technical problems quickly and efficiently. Tools like the HopToDesk stand out for their simplicity and security, allowing IT technicians to remotely access computers to provide quality support.
If you need technical help and want to know how to use HopToDesk, this guide will guide you on how to install the tool and share your ID with the IT technician. With just a few simple steps, you can connect securely and get the necessary support.
What is HopToDesk?
The HopToDesk is a free and open-source remote support solution that allows access to computers in a practical and secure way. It is an excellent alternative to tools like AnyDesk and TeamViewer, focusing on privacy and ease of use.
Main features of HopToDesk:
- Open source: Transparency and customization possibilities.
- Security: End-to-end encryption to protect your data during the connection.
- Cross-platform: Compatible with Windows, macOS, Linux, Android, and iOS.
- Simplicity: Intuitive interface, ideal for users of all levels.
- Corporate or personal use: Support for local networks or internet connections.
With HopToDesk, companies and individuals can solve technical problems quickly, saving time and ensuring data security.
How to install
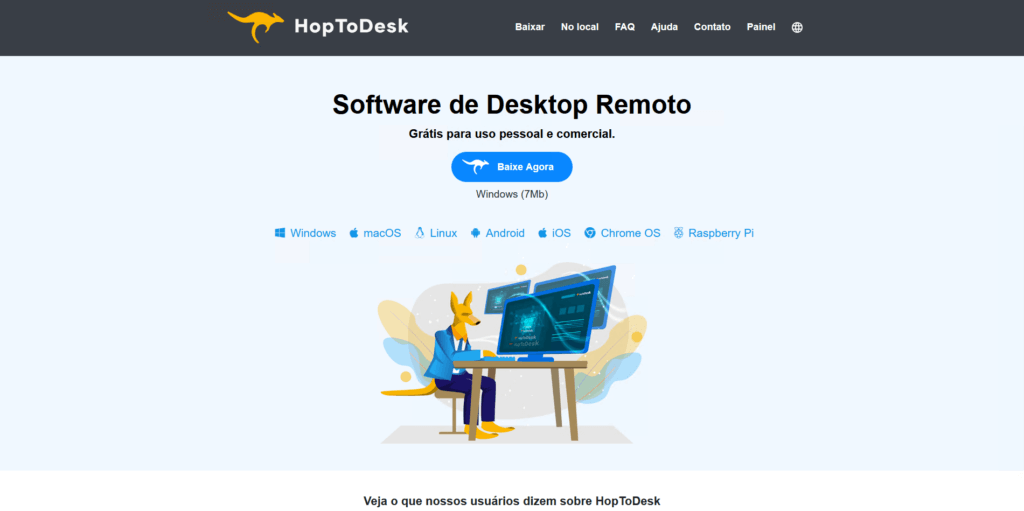
To start the HopToDesk installation process, you need to access the company’s official website, you can access it through this link: Click here.
After clicking the link, you can see the homepage of the website.

Then, click on “Download Now” and the HopToDesk installer will be downloaded.

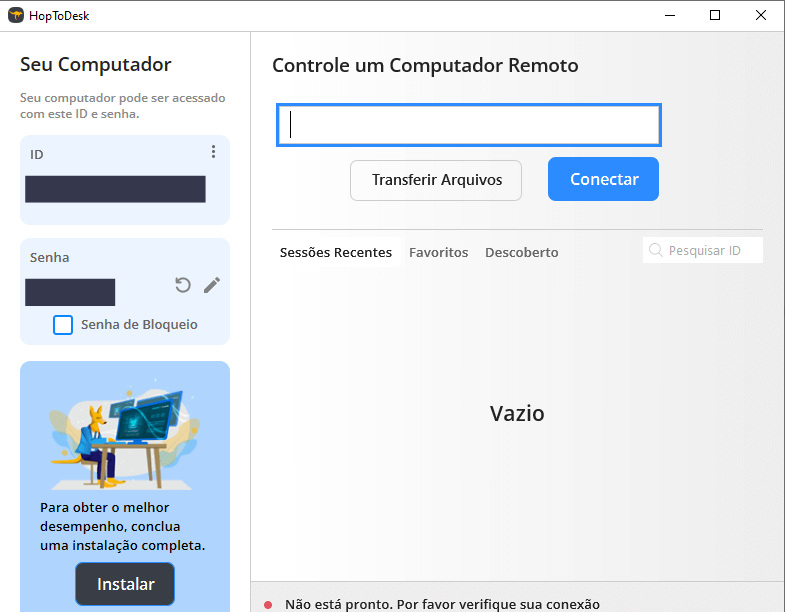
Double-click the file to run it. This will open the HopToDesk start screen.

The application is already usable, but to be fully installed it is recommended to click on “Install” on the gray button on the left side of the screen.

Configure as desired and click “Accept and Install”.
If done correctly, HopToDesk should be installed and functioning normally, ready for use.
How to use

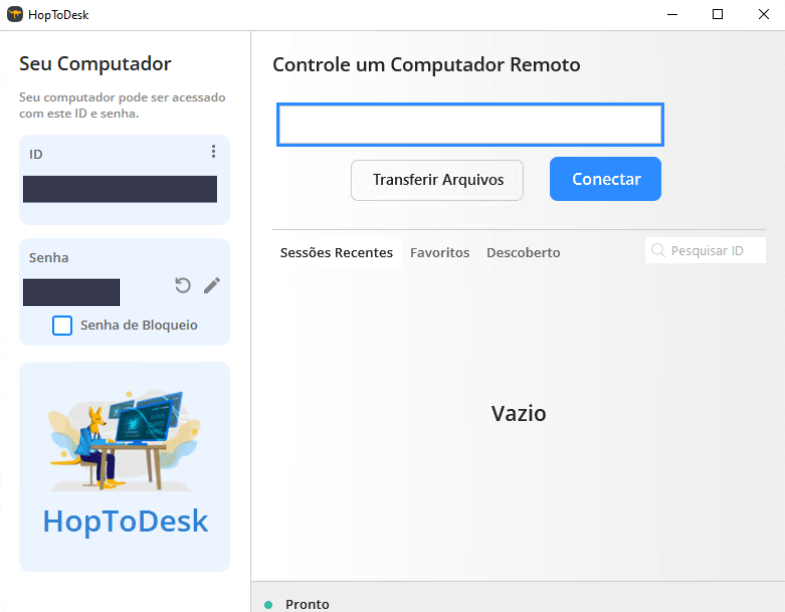
This is the HopToDesk start screen, where you can see:
- ID: This is your computer’s ID for making the connection. It should be provided to the technician along with the password so that they can connect.
- Password: This is the password for the connection to be made, it must be provided to the technician along with the ID for the connection to be successful.
- Control a Remote Computer: This is the box where you enter the ID of the computer you want to connect to control.
Final considerations
Remote support is an indispensable tool in the modern world, and HopToDesk stands out as a practical, free, and secure solution for efficiently connecting devices. Whether for personal or corporate use, the tool offers simplicity and robustness, allowing IT technicians to solve problems quickly while ensuring data privacy.
With this guide, you have learned how to install and use HopToDesk to provide remote access to your computer. By following the steps presented, you will be prepared to share your ID and password securely and obtain the necessary support quickly.
If you want to see more tutorials like this, or learn more about the extensive world of IT, follow the master of the web on our blog or on our networks like YouTube, Facebook, and Instagram to see more posts like this!