How to install RustDesk and provide the ID to the IT technician?

In an increasingly connected world, remote support has become essential for businesses and users who need quick and efficient solutions for technical problems. Tools like RustDesk have gained prominence for their practicality and security, allowing reliable remote access to computers.
If you are facing technical difficulties and need the assistance of an IT technician, installing RustDesk and providing your connection ID is a simple process that can speed up problem resolution. In this article, we will explain how to set up RustDesk on your computer and share the necessary information for successful remote support.
What is RustDesk
RustDesk is an open-source remote support tool that allows practical and secure access to computers. It is an alternative to software like AnyDesk and TeamViewer, offering advantages such as:
- Open-source: Transparency and customization.
- Security: End-to-end encryption.
- Self-hosting: Option to set up your own server for greater privacy.
- Cross-platform: Works on Windows, macOS, Linux, Android, and iOS.
- Easy to use: Simple and intuitive interface.
With RustDesk, IT technicians can provide efficient remote support, ensuring privacy and resource savings.
How to Install
The first step for installation is to access the official RustDesk website to start the installation process. You can access the site through this link: Click here
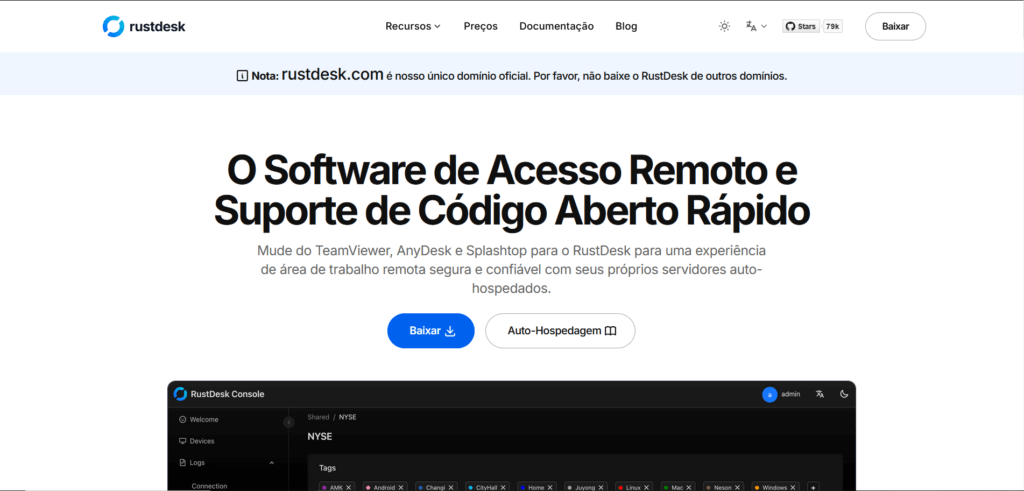
Click the blue button labeled “download” to choose which installation you want.
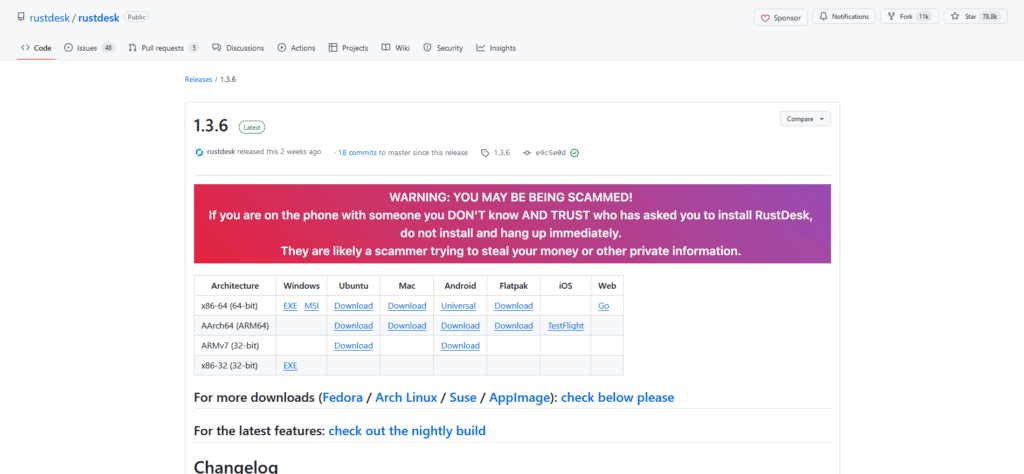
Choose the one that best fits your system.

After choosing the version you want, you will see the download file. Once the file is downloaded, double-click to start the installer.
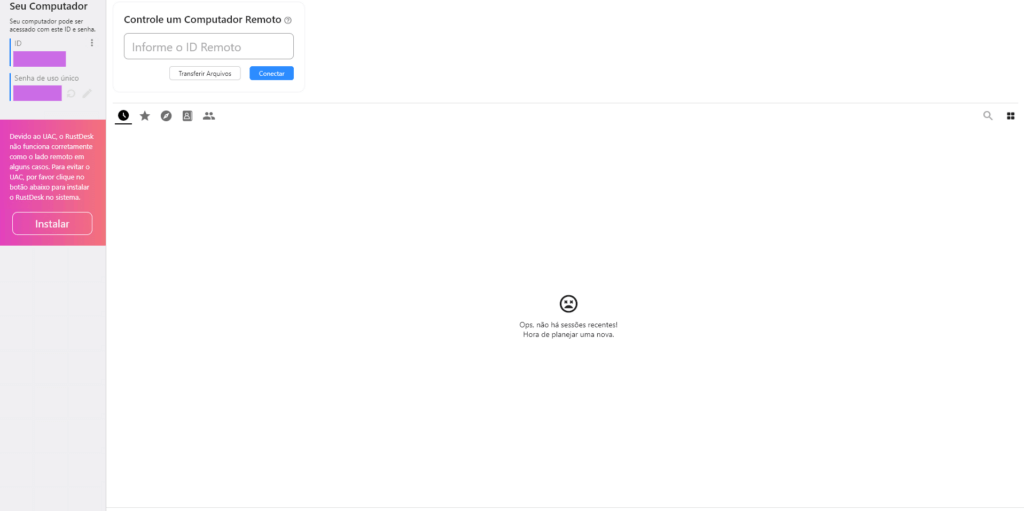
At this point, you can already use the system, but if you want to keep it on your computer, you will notice a purple and pink box on the left side with a button labeled install. Clicking the button will open the system installation screen.

Choose the desired options and click accept and install to complete the RustDesk installation. If done correctly, the application should be installed and functioning properly.
How to Use
On the left side of the screen, you can see the following information shown in the photo.
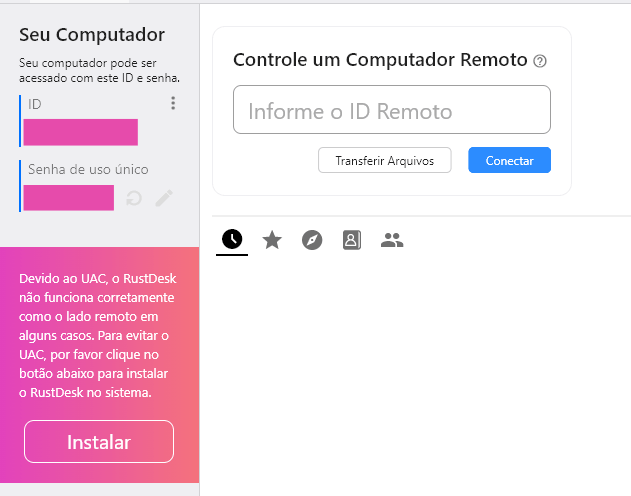
- ID: This is your computer’s ID for making the connection. It should be provided to the technician along with the password so that they can connect.
- One-time password: This is the password for the connection to be made. It should be provided to the technician along with the ID for the connection to be successful.
- Control a Remote Computer: This is the box where you enter the ID of the computer you want to connect to and control.
Clicking the three dots in “ID” will open RustDesk settings. We will not go into the application’s settings in this article, but clicking on the security tab will reveal interesting settings.
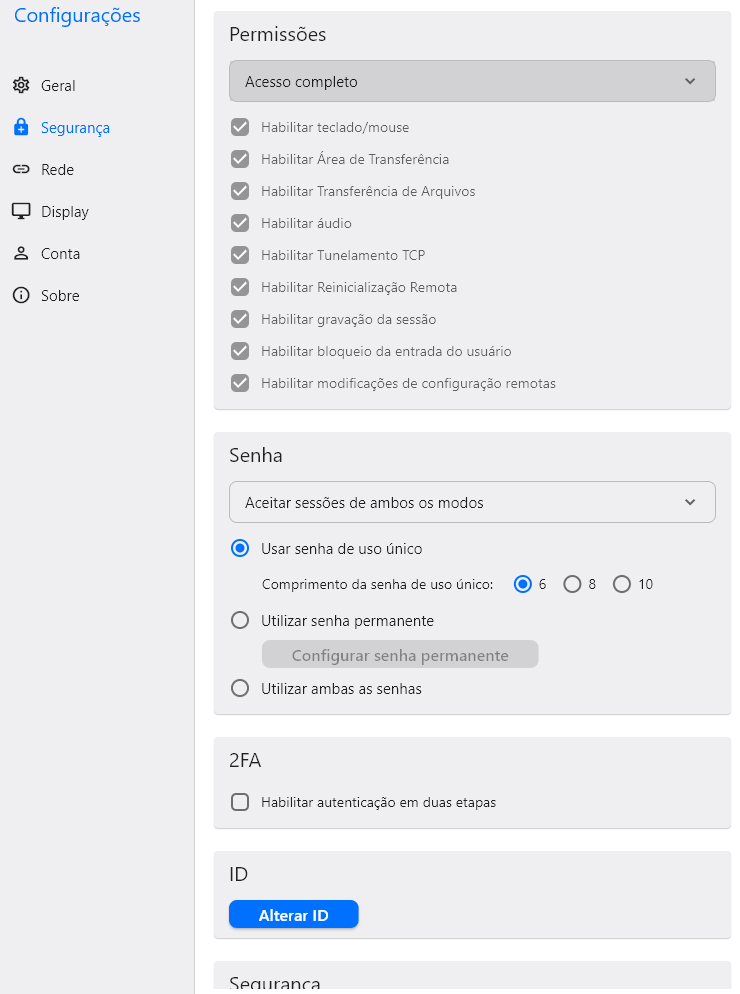
- Permissions: In permissions, for the technician to perform the service efficiently, RustDesk must have full access so that the technician can use the computer freely.
- Password: In password, you can fully configure RustDesk’s password, such as choosing the length of the one-time access password, selecting the desired password for the permanent password, or choosing to use both passwords.
- 2FA: For greater security, you can enable two-factor authentication.
- ID: You can change the ID to one of your choice.
With these settings, you can configure RustDesk to your liking, as well as ensure greater security to prevent unauthorized access.
Final considerations
Remote support is an indispensable solution for resolving technical issues quickly and efficiently, and the RustDesk stands out as a reliable, secure, and easy-to-use tool. With its simple installation and advanced features, it provides a practical experience for both users and IT technicians.
By following the presented step-by-step guide, you will be ready to use RustDesk and provide remote access to your computer securely. Whether in emergency situations or for routine maintenance tasks, this tool is an excellent choice to ensure the continuity and performance of your activities.
Try RustDesk and discover how remote support can transform the way you resolve technical issues, with more agility and fewer complications.
If you want to see more tutorials like this, or learn more about the extensive world of IT, follow the master of the web on our blog or on our networks like YouTube, Facebook, and Instagram to see more posts like this!