What is the ideal server for Profit and Metatrader?

Introdução
When it comes to Profit and MetaTrader (MT4/MT5), the focus commonly falls on brokers, operational costs, platforms, and strategies. However, at Master da Web, we consistently observe the decisive impact of IT infrastructure on results: crashes, disconnections, slow order sending, and general instability are, in most cases, directly related to the computer or server on which these platforms are installed.
In this article, we objectively present the characteristics of a suitable server for professional use of Profit and MetaTrader, as well as the most recommended VPS configurations for different trader profiles.
Best VPS configurations for Profit and MetaTrader
Below, we provide reference configurations for different usage profiles. This is not a rigid rule, but a safe guide to get started in the Master da Web environment.
Profile 1 – Beginner / Light Trader
Suggested VPS 2 configuration:
- CPU: 2 high-performance vCPUs
- RAM: 4 GB
- Disk: 40–60 GB storage
- SO: Windows Server 2019/2022
This configuration allows you to operate manually, use few assets and indicators, and keeps only one instance of Profit or MT4/MT5 open.
Profile 2 – Intermediate / Multiple charts and some robots
Suggested VPS 4 configuration:
- CPU: 4 high-performance vCPUs
- RAM: 8 GB
- Disk: 80–100 GB storage
- SO: Windows Server 2019/2022
Here, you can track multiple assets in real-time, use more charts, times & trades, indicators, and run some EAs in MetaTrader.
Profile 3 – Advanced / Intensive robots and multiple platforms
Suggested VPS 6 configuration or dedicated server:
- CPU: 6 high-performance vCPUs (or dedicated server with Ryzen 5+)
- RAM: 16 GB or more
- Disk: 150–200 GB storage
- SO: Windows Server 2019/2022
Within this configuration, it is possible to run multiple EAs at the same time on multiple accounts and do backtests with excellent optimization.
In this range, many Master da Web clients migrate to dedicated servers to have:
- Totally exclusive resources;
- Maximum performance predictability;
- Possibility to create several internal VMs, separating environments (e.g., one VM only for Profit, another only for robots).
Best practices when using your VPS/server for trading
Regardless of the plan you choose at Master da Web, we recommend:
- Keep the VPS focused on trading
Avoid installing unnecessary programs (games, heavy applications, etc.). - Plan Windows updates
Leave automatic updates and restarts for times outside of trading hours. - Monitor resources
Pay attention to CPU, RAM, and disk usage. If it is frequently at the limit, consider upgrading. - Reinforce security
Use strong passwords, backups, secure authentication and, if possible, access restrictions (IP, VPN, etc.).
How to acquire a VPS through Master da Web?
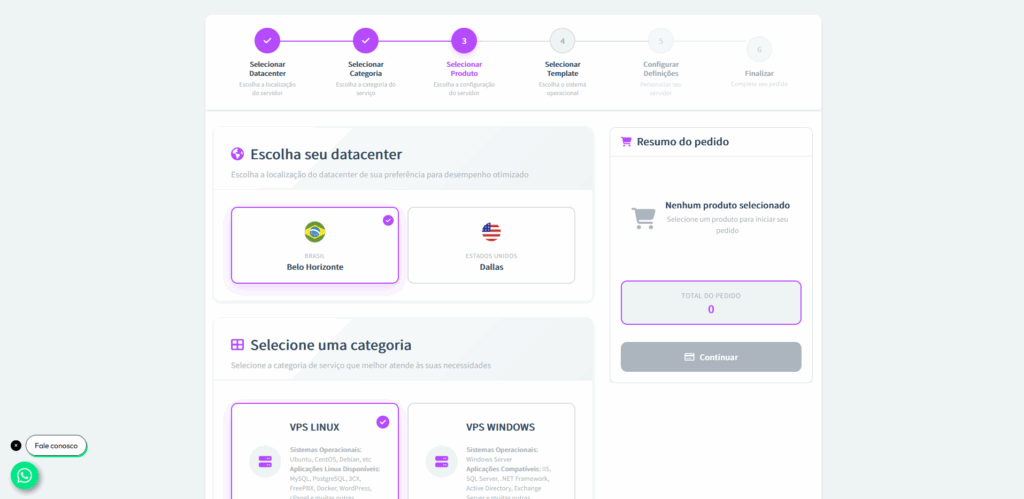
Step 1: Visit the official Master da Web site at masterdaweb.com. Upon entering the homepage, scroll down until you find the “VPS (Virtual Private Server)” card. When you find it, click on “Learn More” to be directed to the specific VPS servers page.
Step 2: On the VPS page, click on “View Plans”. You will be automatically redirected to the plans section. In the “VPS Windows” card, click on “Get Started”.
Step 3: On the contracting page, choose the desired datacenter. Then, select the “VPS Windows” category.
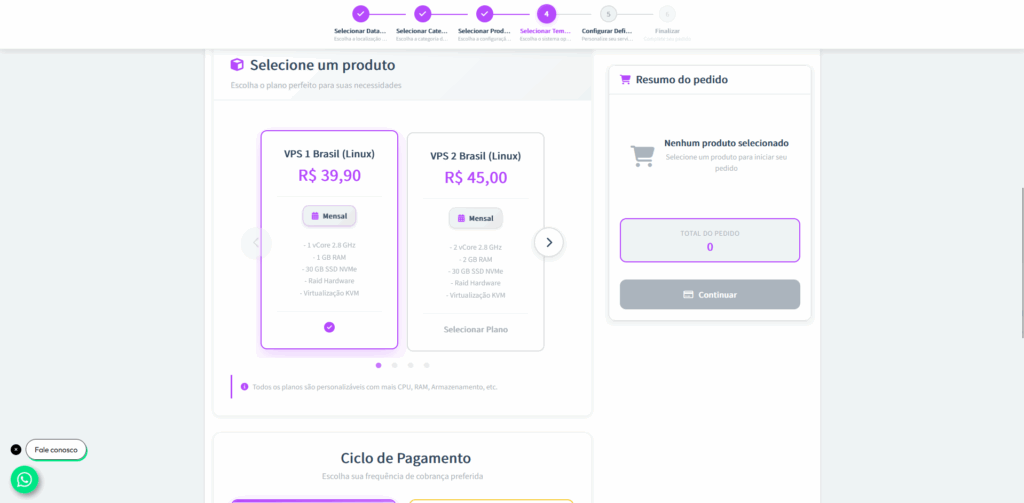
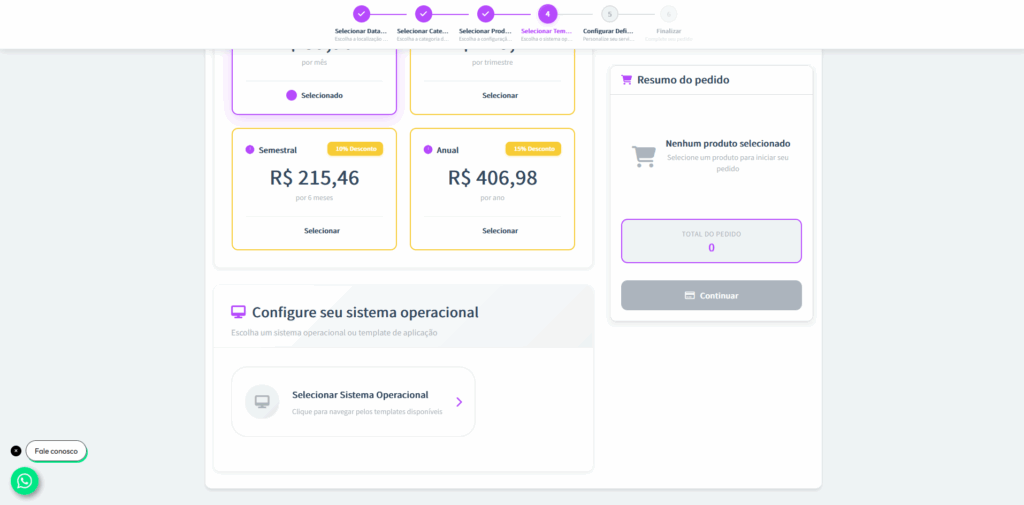
Step 4: Now, choose the type of VPS that best suits your needs as mentioned above. Then, select the payment cycle (monthly, quarterly, semi-annual, or annual).
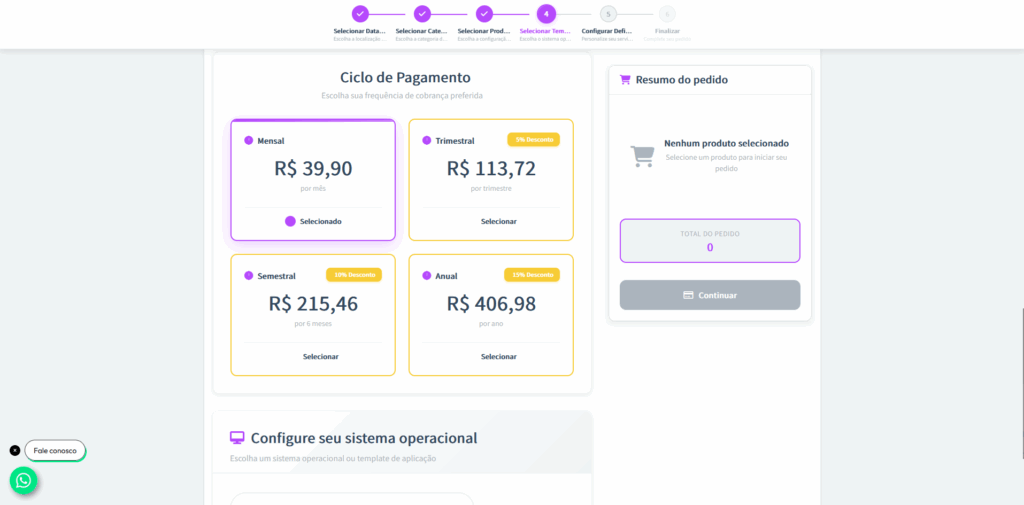
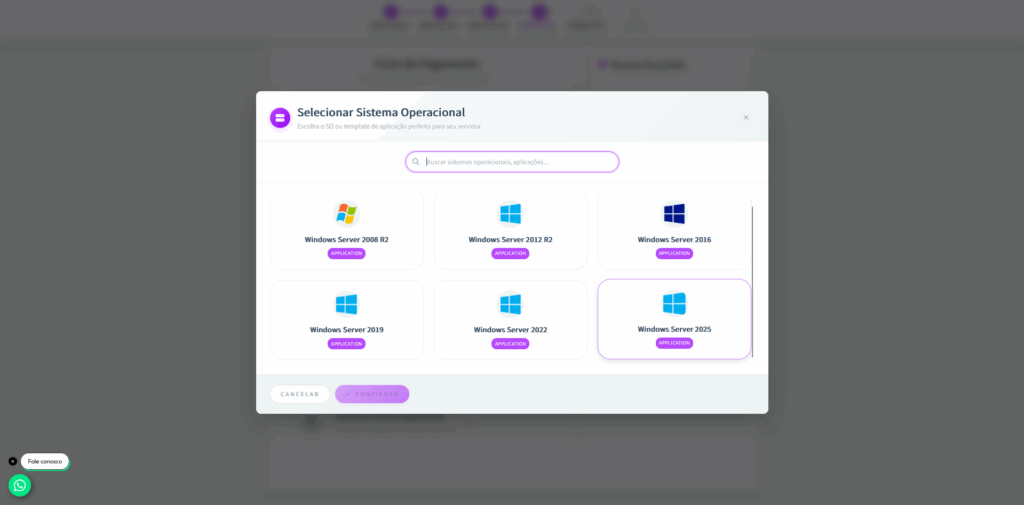
Step 5: Next, define the Operating System for your VPS. In this case, choose the Windows Server version that best suits you and then click Select.
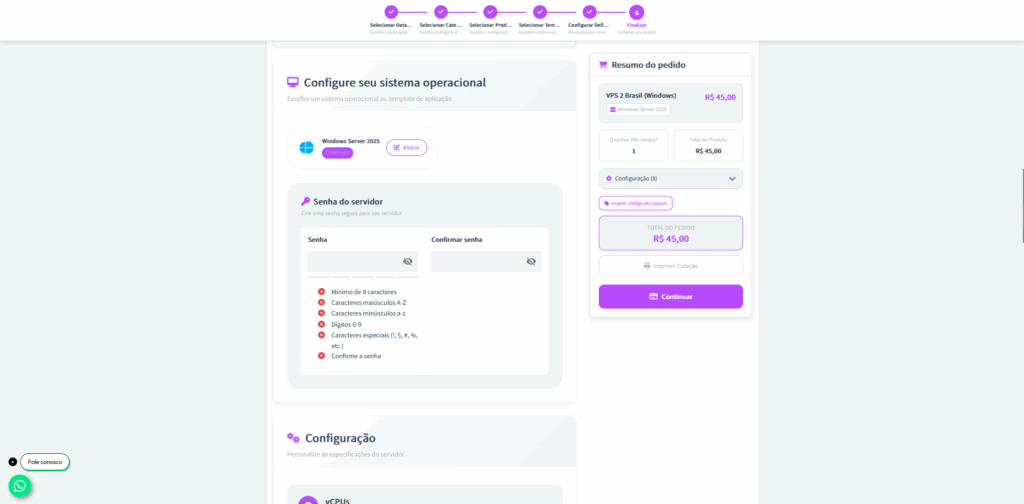
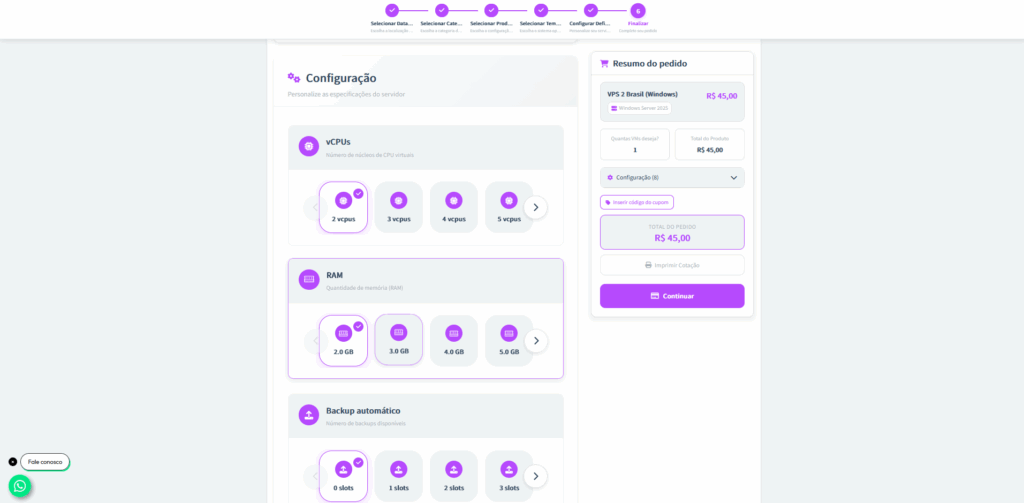
Step 6: Create an access password for your VPS. Right after, you can customize the specifications of the server, adjusting resources such as vCPUs, RAM memory, storage, and other configurations according to your needs.
Step 7: In your VPS settings, you can enable your license (If you have questions about Windows licensing, you can access the blog Windows Server: With or without a license? to better understand the differences between using the licensed system or not.).
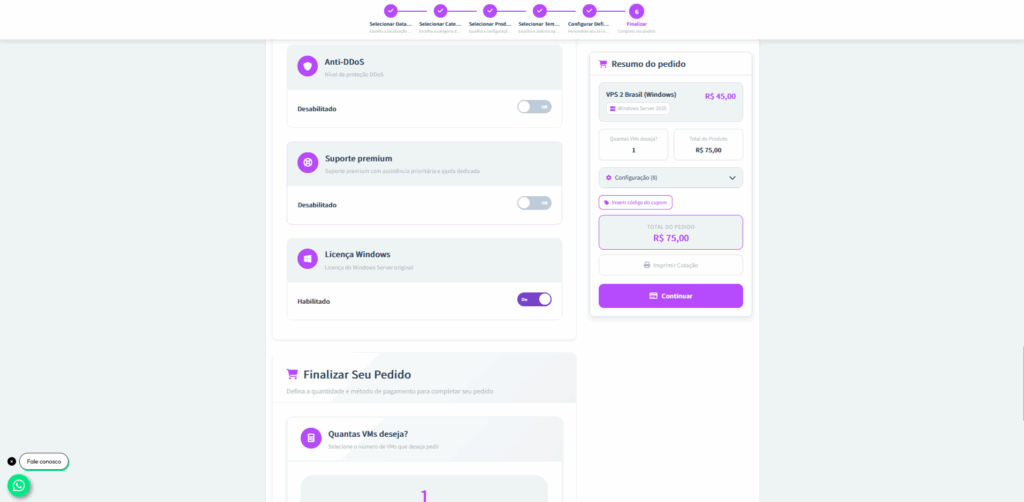
Step 8: After customization, choose how many VMs (Virtual Machines) you want to contract and define the payment method.
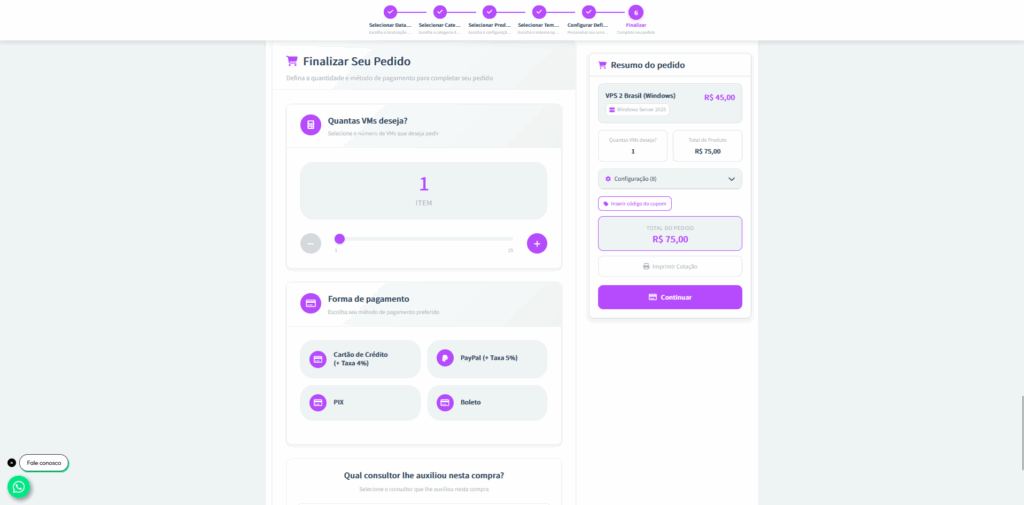
Step 9: If during the contracting process you were assisted by any Master da Web consultant, this is the time to select them. This way, the responsible consultant will receive due recognition for the service provided.
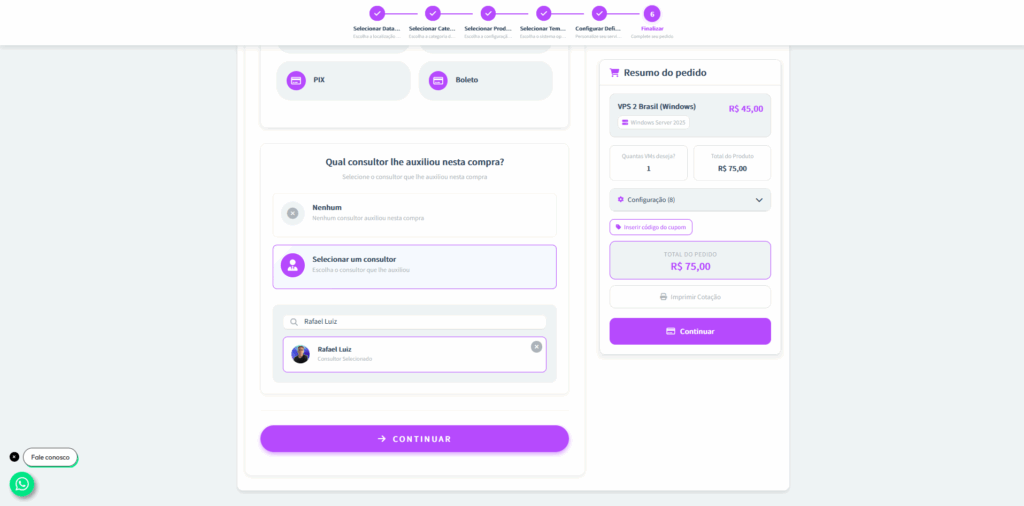
Step 10: After payment is confirmed, the VPS will enter the configuration and production process. Once ready, you will receive a notification by email or WhatsApp with the IP, username and access password to your machine. This process takes around 30 minutes.
Conclusion
If you are starting out, a well-dimensioned VPS already delivers a huge leap in stability compared to running everything on your home computer.
As your operation grows, it makes sense to evaluate VPS upgrades or even migrate to a dedicated server focused on trading, ensuring that your infrastructure keeps up with the evolution of your strategies.