Add additional domain to cPanel.

In today’s tutorial I’m going to show you how to add an add-on domain to your cPanel administration panel, it’s a quick and easy process.
The function of the add-on domain is to add a new website within your cPanel hosting plan, so you can add as many websites as your hosting plan allows.
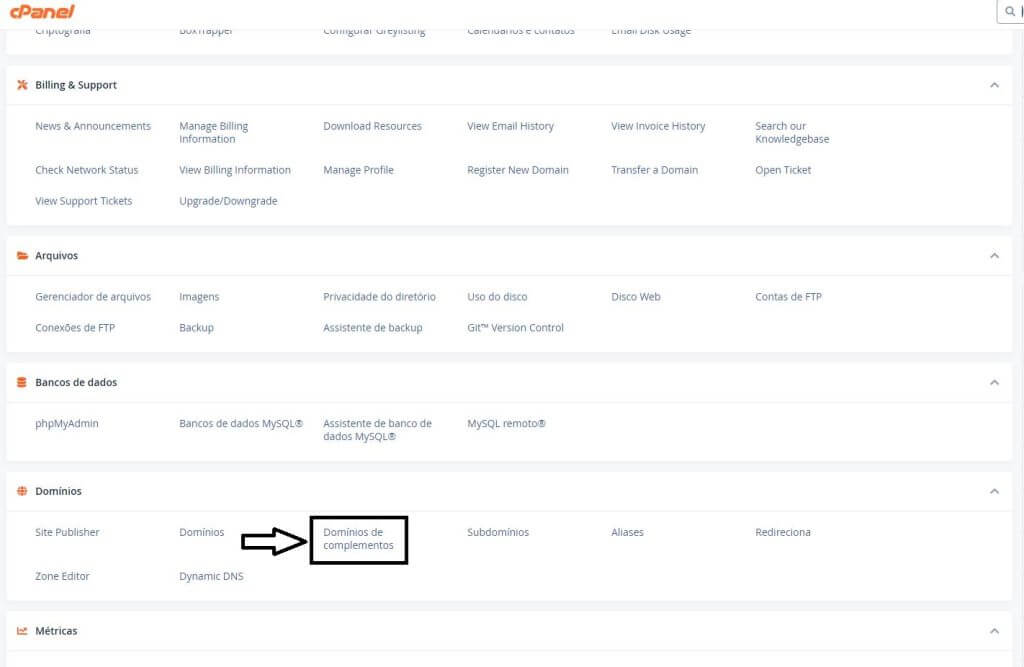
First log in to your cPanel administration panel, then look for the domains option, and under domains go to “Add-on domains” as shown in the image below.

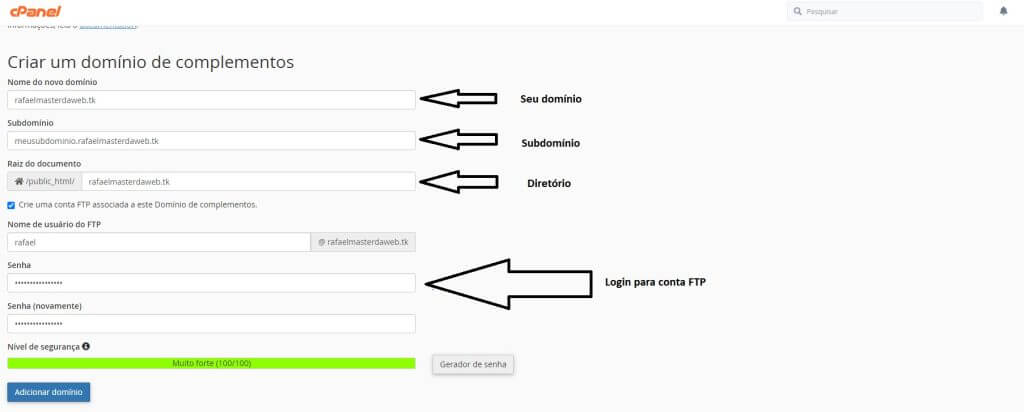
After logging in, the add-on domain creation screen will open, in the “new domain name” field, enter your domain, a new folder will be created inside your root directory, this is where you should place all the content related to your new site, if you wish you can also select the checkbox to create an FTP account, create a login for this user and click on the Add domain button, as shown in the image below.

Your domain has already been added, don’t forget to point to the DNS that will resolve the name, remembering that Master Da Web’s DNSs are: ns1.masterdaweb.com and ns2.masterdaweb.com.